So I have decided to cross post this from my beauty blog as it pertains here as well and I have a completely different audience on both. If you wanna see more posts like this here let me know. And if you don't let me know that as well. If you have horror makeup ideas I would love to hear them as well.
So
yea....I was a little bored today and I had been toying with the idea
of doing another full Halloween/Horror type makeup. Not gonna do a full
tutorial on this one but I did take a few pics along the way. Nothing
special this time it is all just makeup ;)
Here are my supplies...

I
started by mixing 2 of my all time favorite liquid foundations to get
the kinda color I wanted. I mixed MAC Face & Body foundation in
White (This was a seasonal item. It was from the Rick Baker 2013
Halloween line.) & Lancome Teint Miracle in Ivorie 2 (c). Keep in
mind I have a very fair complexion so you may need a darker base color.
The Lancome is a usual for me. I used this all over my face & neck
including my lips and eyes.
Next
I brushed on a loose powder all over. I used MAC Set Powder in
Invisible. It's a nice white color. (Again this is from the Rick Baker
Halloween collection 2013.)

For
my cheeks I used The Balm Stainiac. This is a really cool product. It
is made for cheeks and lips in a highly blendable formula. I usually use
it as a lip stain but today we all know dolls have those nice red
circles as cheeks. I used a very thick layer and blended it with my
fingers.

Next
I used a simple white Wet N Wild pencil to define my eyes. I wanted
them to look very large when photographed so instead of just lining my
water line and under the eyes I extended the liner to the natural crease
under my lower lash line.

And
here is where I started forgetting to take pics LOL. Next I used a
Starlooks Kohl Eye pencil in Obsidian to make the "holes" and cracks in
the porcelain. I started by drawing out a few "sharp" looking shapes and
filling them in...

I
used the same pencil for the rest of the work. I lined under my Faux
lashline I made with the whit pencil. I drew out the "cracks" for the
chips in the porcelain. Next I used my Sephora + Pantone Universe shades
of nature palette. (I freaking love this palette...all the colors go so
well together!) Using a small shadow brush I used color 19-4205 to
"highlight" the cracks and chips.
For my eyes I Used color 14-2808 just above the white liner on my lid, 17-3911 in the crease, & 12-1310 to almost the brow bone.
I
added 2 sets of false lashes...True Or False brand Medusa lashes on the
top, Ardell 120 Demi lashes on the bottom. On the top lashes I used MAC
Zoom Flash mascara.
I used Urban Decay 24/7 Glide on liner in Desperation to create my freckles.


And
finally for my lips I used TWC Lip Pencil in Laia (Just really to draw
out the shape I wanted) and Be A Bombshell Lip Gloss in Hot Mess.

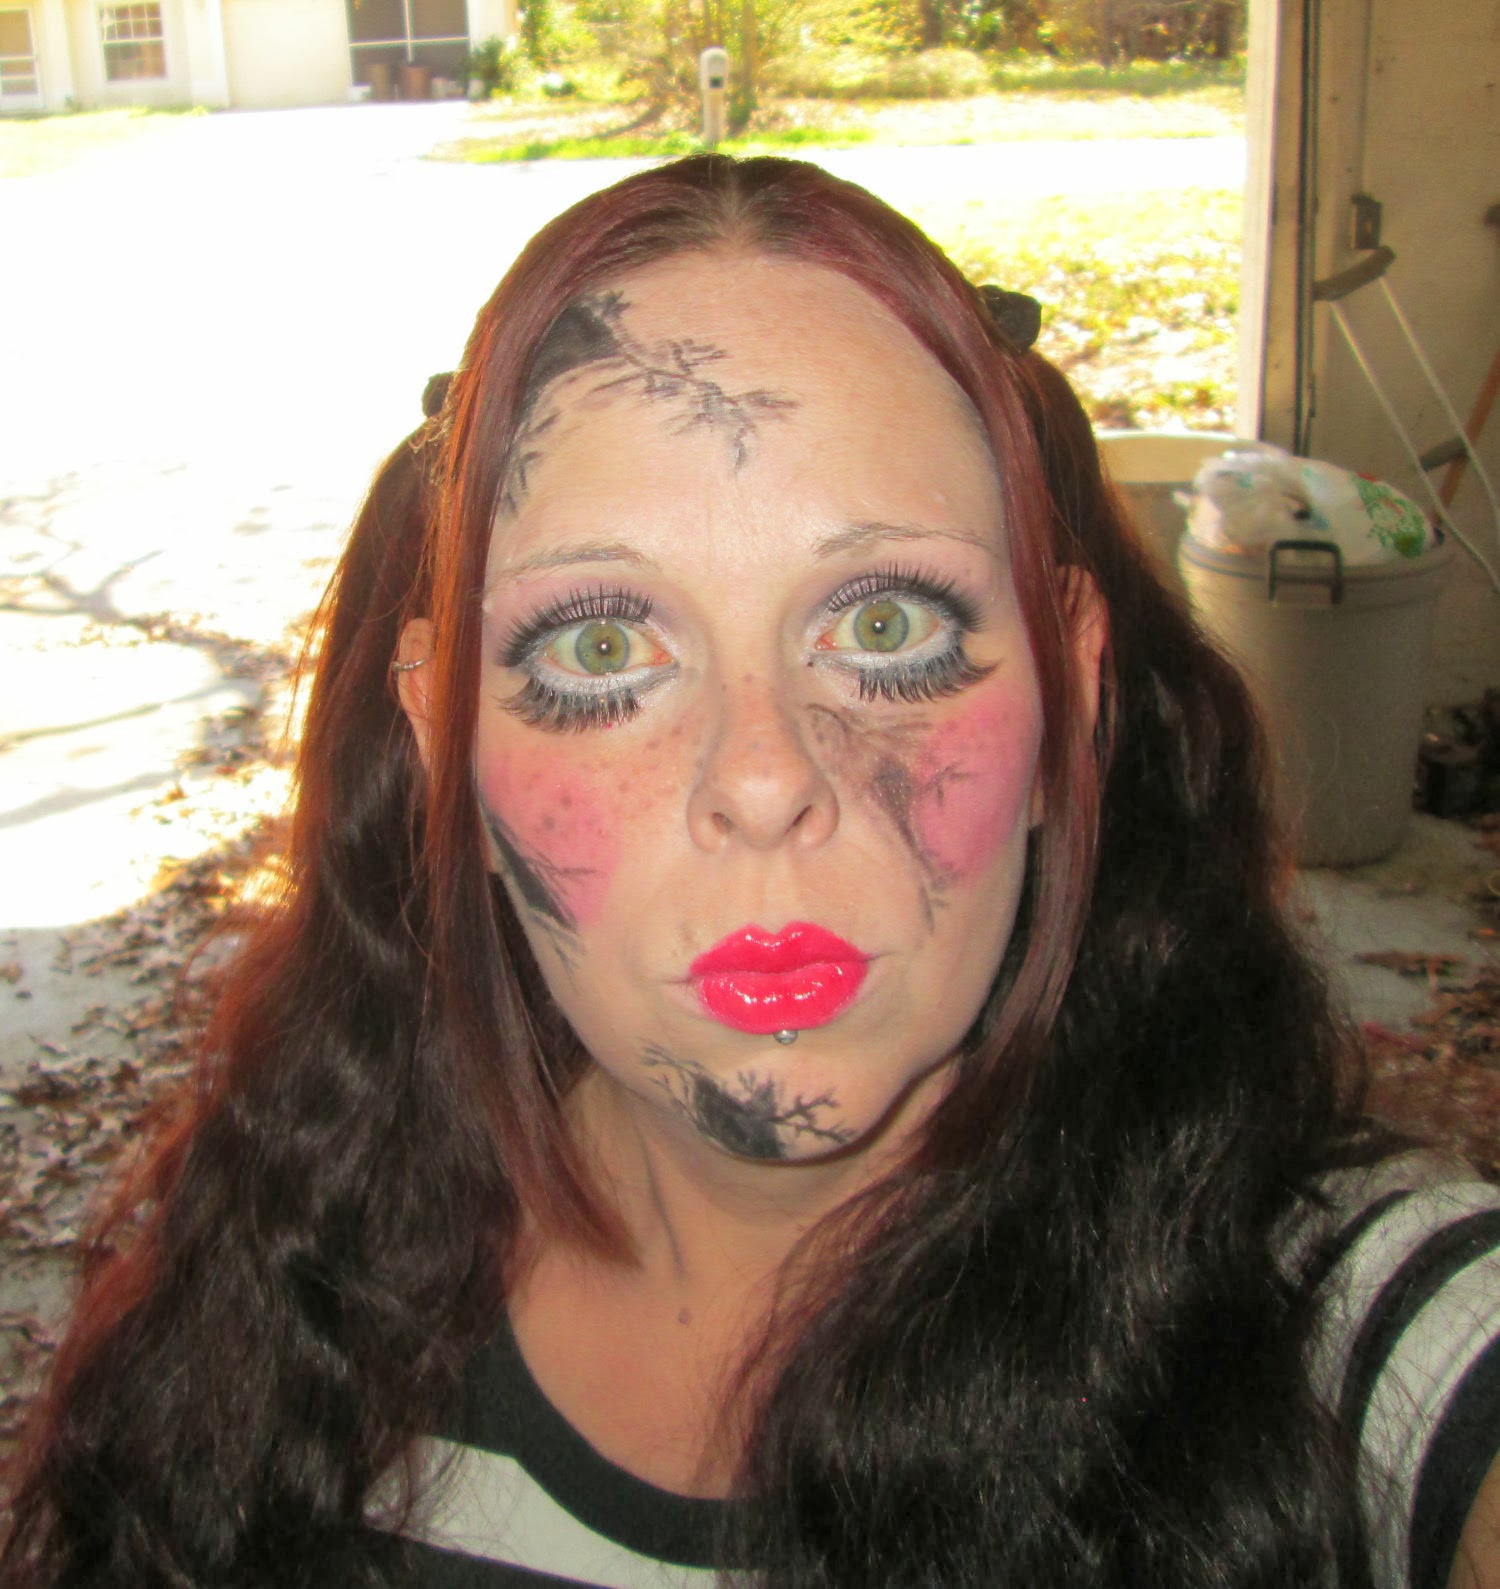
And here is what it all looks like...


So
yea...Kinda had fun with this spur of the moment. Could I do
better...Probably. But hey...Now I know what I can improve and how to do
it right! I really do hope you enjoyed this overall though. If you have
any makeup ideas and such you would like to see me try let me know what
they are. I am kinda falling in love with creating crazy fun makeup
using just everyday products.


Licks & Lashes,
Mistress Tragedy
No comments:
Post a Comment